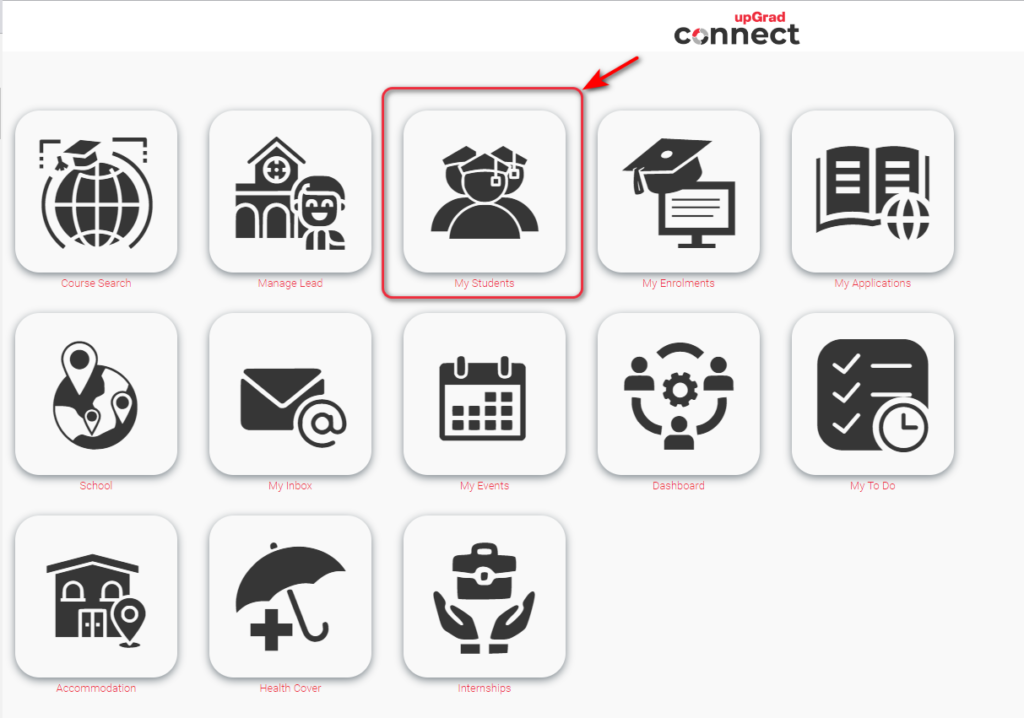
All Notes section of all records are located at the right-hand side panel when you are in the record page. In this sample, the Students Record Page. You may view Notes in the list that you did not create since your assigned BDM can create notes related to the students you are processing.
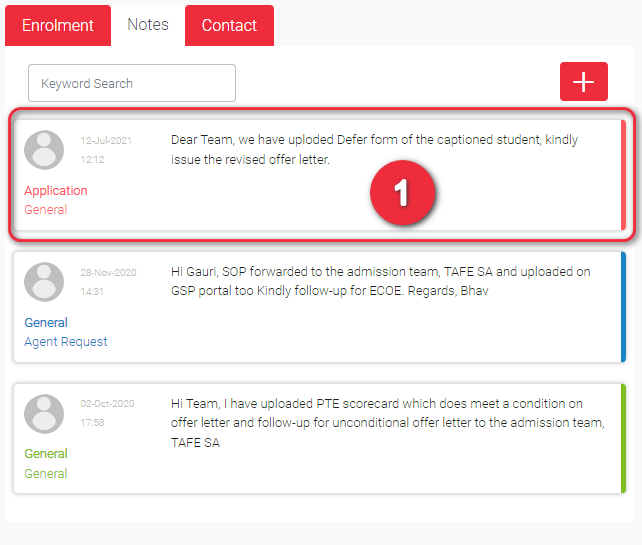
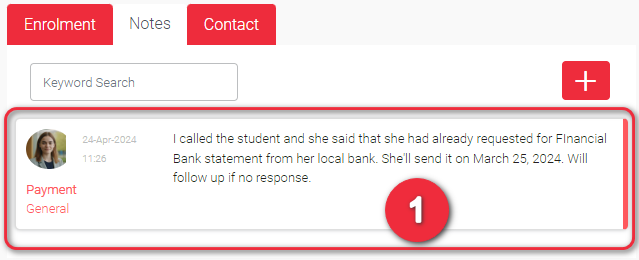
Notes are listed in a card display. The details in the card are important to determine the following:
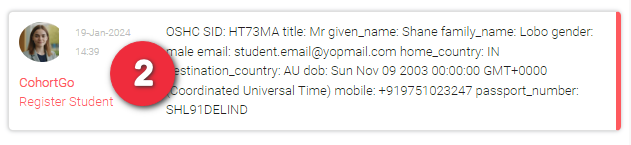
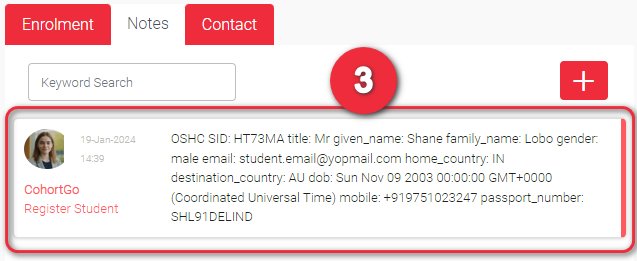
Note Creator – the profile picture of the person who created the note. If a note has been updated either by the creator or GSP Admin, then the profile picture you see in the note card should not be changed. Generally, only the Counsellor who created the note can update the note details.
2
Category – knowing the category makes it easier to identify to which the note is pertaining to. The use of colors in the cards has nothing to do with the category but colors makes it more visible to see the separation of cards.
Date – This is the date when the note was created.
Time – This is the time when the note was created in military format. Time is automatically converted from where you are in the world.
Description – This is the note description pertaining to the record page you are in. In this card view, the words per note are limited to around 40 words. If the note exceeded to this, you will see ellipsis. You can click the Note card to view the complete description.
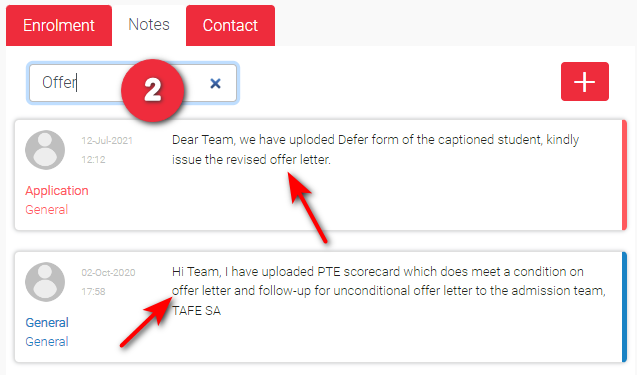
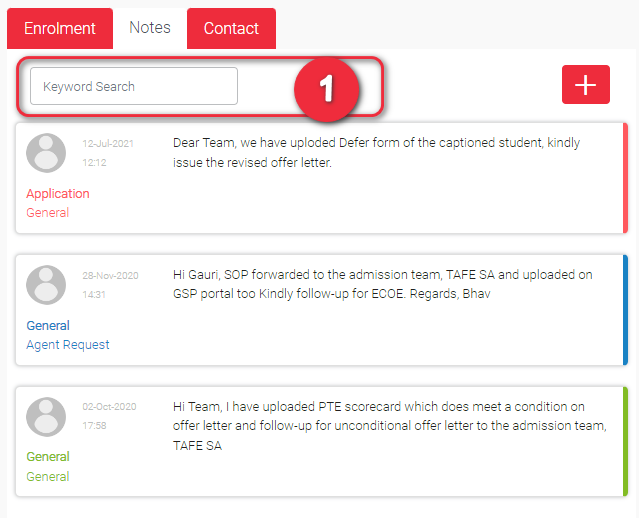
There may be times that there are many notes (displayed in card views) pertaining to a specific record and reading notes one by one can be difficult. In these situations, you can use Search notes.
1
2
Just type the keyword(s) you are looking for and the note cards will be filtered accordingly. Search keywords that found match to the note description should only be displayed in the list. Keyword search works only for note description.
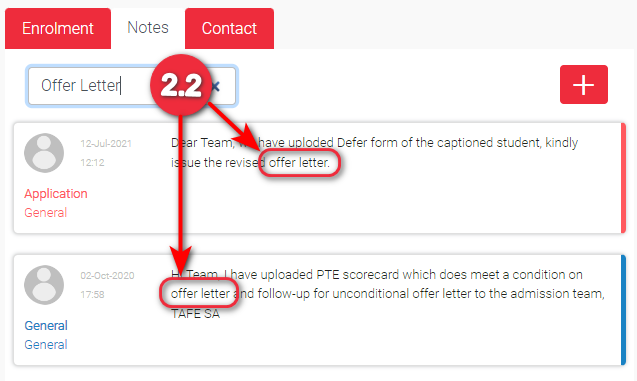
Using multiple keywords can also help. However, the keywords you place in the Search text field should match the note description ‘in order’ or else it won’t work. Thus, it is recommended to use one keyword if you don’t remember much of the note description.
Example Given the description in the note you are looking for has ‘transfer payment’.
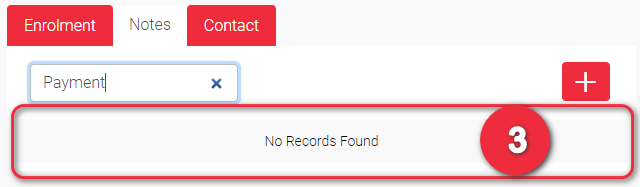
Image 2.1 You typed ‘Letter of Offer’ in the Search text field. Then, the note card will not be displayed since the wordings in order is ‘Offer Letter’. No Records Found
Image 2.2 You typed ‘transfer payment ‘ in the Search text field. Then, the note card will be displayed since the wordings in order is also ‘Offer Letter’.
You will see ‘No Records Found’ when the keyword you typed in the Search text field does not match to any of the note descriptions created under the record you are in.
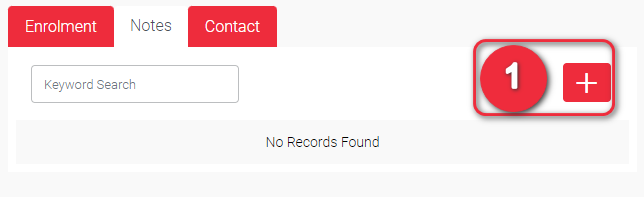
The same ‘No Records Found’ is displayed if there are no notes added yet to the record.
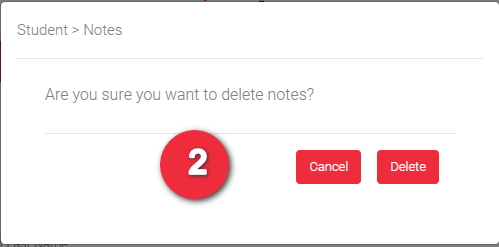
Click the trash bin in the Notes pop-up display to delete a note. You can only delete notes which you created.
1
2
A confirmation pop-up will be displayed. Click ‘Delete’ button to delete the note you have selected. Click ‘Cancel’ if you do not want to proceed on deleting the Note.
The deleted Note should no longer be viewed in the list of notes.
Click the ‘+’ sign to add a Note related to the record page you are in.
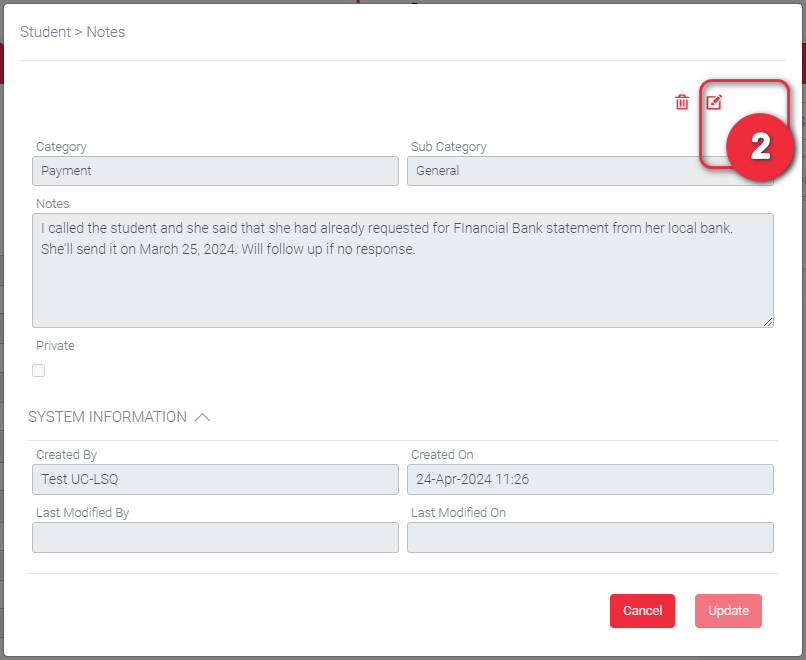
A pop-up will be displayed so you can input the Note details, aside from the description itself.
Category and Sub Category are used to easily determine to which the Note is pertaining to about the record. Sub Category is dependent to Category. This means that the picklist of Sub Category will depend on what you have selected in the Category field. There is a wide variation of Notes that you can add. Below are some of which we can categorise. If nothing seems fit, select General.
Notes – This is where you can input the complete description of the Notes.
2
Application
Documents
Lodgement
Student Request
Agent Request
BDM Request
Institution Request
Course Selection
General
COE
Student Request
Agent Request
BDM Request
Institution Request
General
CohortGo
Register Student
Lead Follow Up
Deferral
Student Request
Agent Request
BDM Request
Institution Request
Approval
General
Enrol
Student Request
Agent Request
BDM Request
Institution Request
Approval
General
GTE
Documents
Student Request
Agent Request
BDM Request
Institution Request
Interview
SOP
General
Withdrawal
Student Request
Agent Request
BDM Request
Institution Request
Refund Application
General
Study Background
Documents
Student Request
Agent Request
BDM Request
Institution Request
Course Selection
Current CoE
General
Payment
Agent Request
BDM Request
Institution Request
Approval
Invoice Cancelled – DNP
Invoice OnHold – Fees not Paid
Payment Follow-up
General
Offer
Acceptance Follow-up
Acceptance Received
Documents
Student Request
Agent Request
BDM Request
Institution Follow-up
Institution Request
Special Condition
Student Request
Agent Request
BDM Request
Institution Request
Approval
General
General
Student Request
Agent Request
BDM Request
Institution Request
General
Visa
Student Request
Agent Request
BDM Request
Current Visa
Institution Request
Interview
VEVO Details
General
3
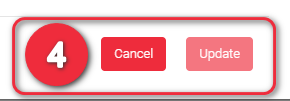
Click ‘Create’ button to save the Note you just made. Click ‘Cancel’ button if you do not want to add the Note anymore.
Click ‘Create’ button to save the Note you just made. Click ‘Cancel’ button if you do not want to add the Note anymore.